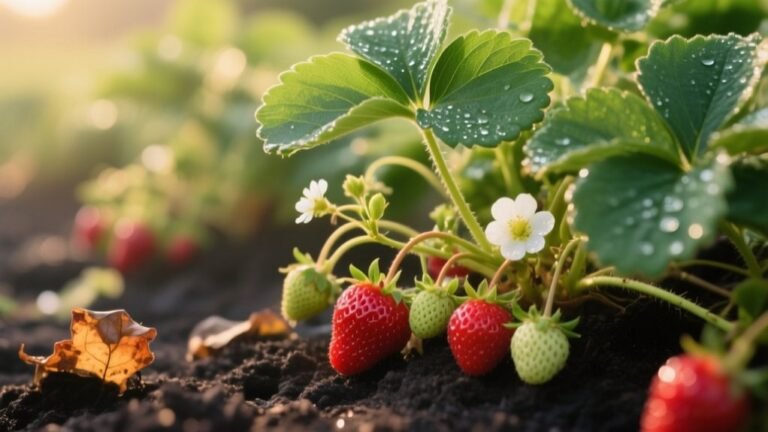

Grow Strawberries Easily in 7 Steps
To grow strawberries easily, start by choosing a variety that suits your climate, like June-bearing or everbearing. Gather supplies such as empty pots and nutrient-rich soil.
Extract seeds from ripe strawberries and plant them shallowly in biodegradable pots. Keep soil moist and place pots in warm, light spots for germination.
Once seedlings sprout, transplant them properly, monitor for pests, and propagate runners to expand your patch. Following these steps sets you up for a successful harvest. There’s plenty more to explore to perfect your growth.
Choose the Right Strawberry Variety for Your Climate
How do you pick the best strawberry variety for your climate? Start by researching local varieties that thrive in your zone. This is your number one step.
June-bearing strawberries produce larger fruits but only during a concentrated harvest. They’re ideal if you have a distinct growing season.
June-bearing strawberries offer larger fruits in a concentrated harvest, perfect for distinct growing seasons.
If your winters are mild and your growing season long, everbearing strawberries might suit you better since they yield smaller fruits continuously.
Consider the average frost dates too, as these affect when to plant and which variety will perform well.
For your first year, focus on getting healthy plants established. By the following year, you should see a good harvest.
Choosing disease-resistant varieties also helps keep pests and illnesses at bay, ensuring better yields.
Gather Supplies and Find Viable Strawberry Seeds
Once you’ve chosen the right strawberry variety for your climate, it’s time to gather the supplies and seeds needed to start growing.
Make sure you have empty toilet rolls or small plastic containers with drainage holes, fresh soil, and a reliable source of strawberries.
To find viable seeds, pick ripe strawberries from the wild, local gardens, or stores.
But remember, shop-bought fruits may have hybrids with less viable seeds.
I grow mine by carefully extracting seeds from multiple strawberries to increase success.
These little things, the right containers, fresh soil, and viable seeds, make all the difference.
Collect enough seeds and store any extras properly so you’re ready to start your strawberry patch whenever you want.
Extract Seeds From Fresh Strawberries
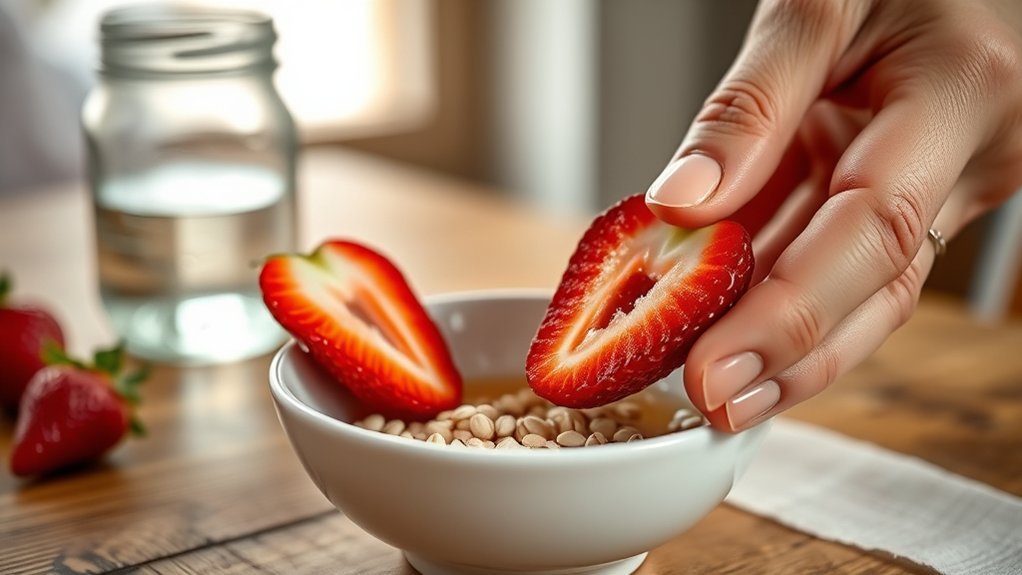
You can easily extract seeds from ripe strawberries by gently prying them off with a toothpick or knife.
Just be careful not to damage the seeds while you’re at it. Once you’ve got them off, spread the seeds out on a paper towel to dry thoroughly.
This step is important because it helps keep the seeds viable for planting later on. It’s a good idea to collect seeds from several berries, so you have plenty to work with when the time comes.
Seed Extraction Techniques
Although strawberry seeds are tiny and located on the fruit’s exterior, you can extract them carefully using a toothpick to avoid damage. This method lets you gently remove seeds with minimal fruit residue, which is essential for successful seed viability testing.
After extraction, properly preparing your seeds guarantees better germination conditions and easier seedling care.
Follow these steps:
- Use a toothpick to dislodge seeds gently from ripe strawberries.
- Place seeds on a paper towel to dry slightly for improved viability.
- Extract seeds from multiple fruits to increase germination success.
- Monitor seedling care closely once sprouts emerge for healthy growth.
Drying And Storage
After carefully extracting the seeds from ripe strawberries, the next step involves drying and storing them properly to maintain their viability. Place the seeds on a paper towel to dry thoroughly, which helps with moisture control and boosts seed longevity.
Even if some fruit flesh sticks to the seeds, it won’t harm germination. For ideal storage, keep your dried seeds in a cool, dry place to preserve their viability for future planting seasons.
| Step | Tip |
|---|---|
| Drying | Use paper towels |
| Moisture Control | Verify seeds fully dry |
| Storage | Store in cool, dry spot |
| Seed Longevity | Use ripe fruit for best results |
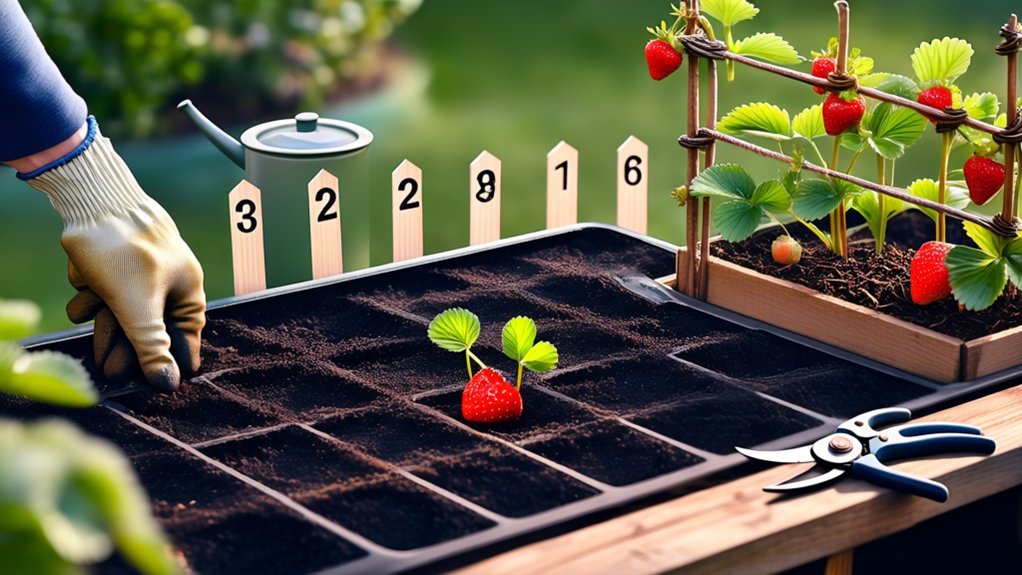
Make Biodegradable Strawberry Seedling Pots
You can easily turn empty toilet paper rolls into biodegradable seedling pots. Just cut them in half and make small slits around the edges so you can fold them up to form the bottom of the pot.
Next, fill each little pot with loose, well-drained soil. Try not to pack it down too much because your seedlings need room to grow their roots.
Then, give the soil a light watering to keep it moist but not soggy.
The best part? When your strawberry seedlings are ready to be planted outside, you can put these pots straight into the ground. They’ll break down naturally, which means less transplant shock and happier plants!
Toilet Roll Pot Preparation
When you cut empty toilet rolls in half and make small slits along one edge, you create simple biodegradable pots perfect for starting your strawberry seedlings.
This method highlights toilet roll benefits and supports eco friendly gardening by recycling waste into useful seedling containers.
To prepare these pots for seedling success, follow these steps:
- Cut rolls in half, then make 1.5cm slits on one edge for easy folding.
- Fill pots with loose, well-drained soil. Avoid compacting it.
- Lightly water the soil to keep moisture steady without flooding.
- Plant pots directly into larger containers or the ground for easy transplanting without root disturbance.
This approach offers a cost-effective, sustainable way to nurture your strawberry plants from seedling to growth.
Cutting And Folding Technique
Although toilet paper rolls may seem simple, cutting and folding them correctly transforms these scraps into effective biodegradable strawberry seedling pots. Start by halving each roll, then apply precise cutting techniques. Make 1.5cm slits along one edge of each half.
Use folding methods to overlap the cut segments, shaping a small pot with an open bottom. This pot assembly holds soil firmly and supports seedling growth. Here’s a quick guide:
| Step | Action |
|---|---|
| 1 | Cut roll in half |
| 2 | Make 1.5cm slits on edges |
| 3 | Fold and overlap slits |
| 4 | Form open-bottomed pot |
| 5 | Ready for soil filling |
You’ll get two pots per roll, making this method eco-friendly and budget-wise.
Soil Filling And Watering
Since strawberries have shallow roots, filling your biodegradable pots with loose, well-drained soil is crucial for healthy seedling growth.
Start by cutting empty toilet paper rolls in half and making 1.5cm slits on one edge to form overlapping segments.
Use a DIY soil mix combining sphagnum peat moss, composted cow manure, and perlite to guarantee proper nutrient management and drainage.
Avoid compacting the soil to maintain ideal soil types for germination.
When watering, apply light moisture to keep the soil damp but not flooded.
Regularly check moisture levels to support seedlings.
Follow these steps:
- Fill pots with loose, well-drained soil mix.
- Avoid compacting soil for root ease.
- Lightly water using gentle watering techniques.
- Monitor moisture for balanced nutrient uptake.
Prepare Soil and Fill Your Strawberry Seedling Pots
Start by mixing sphagnum peat moss, composted cow manure, and perlite to create a well-aerated, nutrient-rich soil for your strawberry seedling pots.
These soil amendments improve pot drainage, which is essential for preventing waterlogging that can harm young plants.
Fill each pot loosely with this blend, avoiding compaction to maintain air pockets that support root growth and proper germination temperature.
Water the soil lightly to keep it consistently moist but not soggy, as strawberries thrive in well-drained conditions.
Regularly check moisture levels to guarantee the soil stays damp, which encourages healthy seedling development.
Sow Seeds and Start Strawberry Seed Germination
When you’re ready to sow your strawberry seeds, carefully extract them from the fruit’s exterior using a toothpick or knife.
Then dry them on a paper towel before planting. Use biodegradable seedling pots filled with loose, well-drained soil to provide ideal growth conditions.
Follow these germination tips for healthy seedlings and effective seedling care:
- Fill pots with soil that’s loose and drains well to prevent waterlogging.
- Lightly water the soil to keep it moist but not soggy.
- Plant seeds shallowly, ensuring the crown stays above soil surface to avoid rot.
- Place pots in a warm, well-lit area to encourage germination and steady growth.
These steps help create the perfect environment for your strawberry seeds to sprout and thrive.
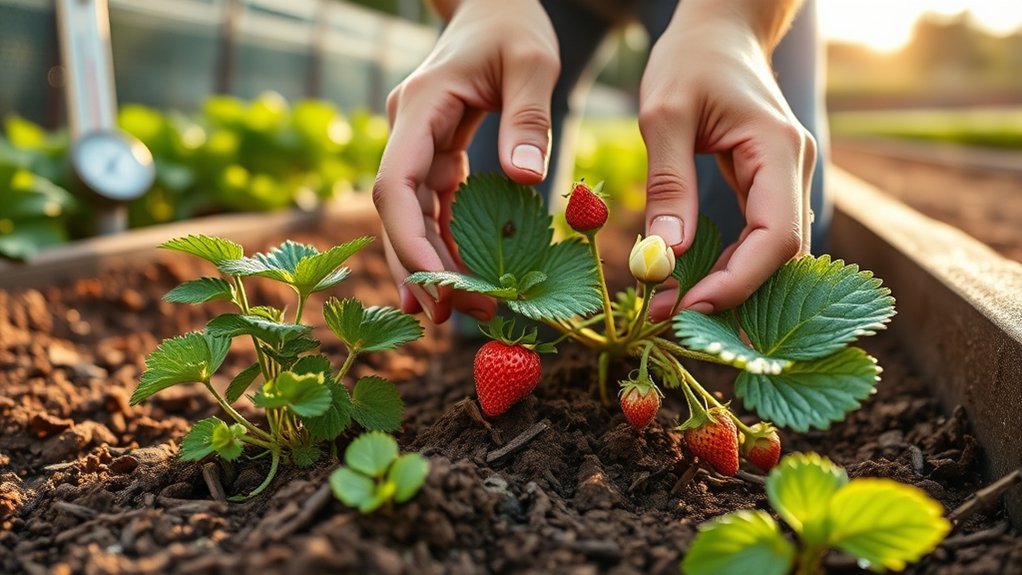
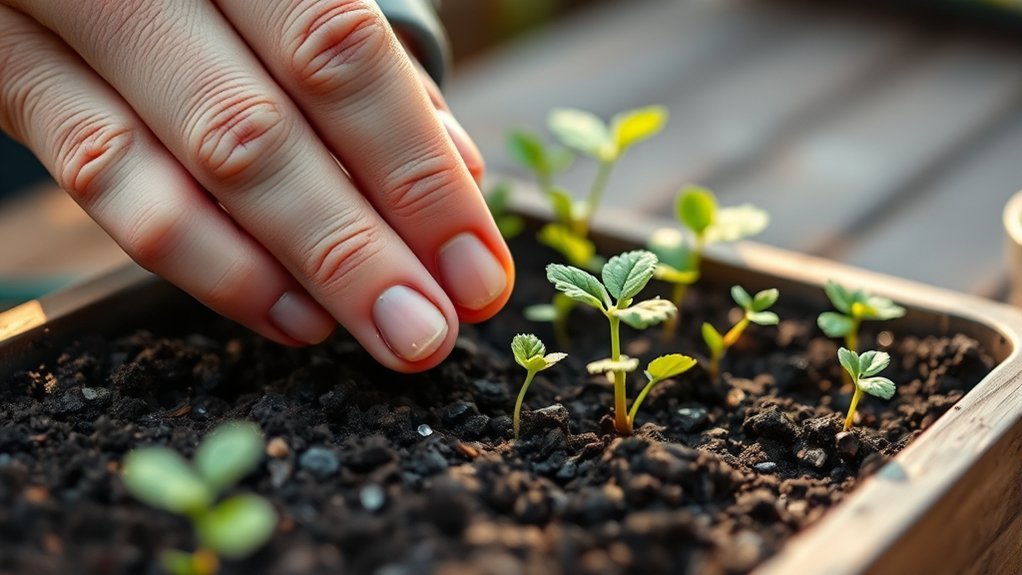
Transplant Seedlings, Manage Pests, and Propagate Runners
Although transplanting strawberry seedlings requires careful attention, you can easily assure their success by keeping the crown above the soil line and giving their shallow roots enough room to spread.
For seedling care, space plants well and fertilize with products like Espoma’s berry tone to boost growth.
Manage pests by regularly inspecting your plants and using companion planting. Mint deters harmful insects effectively, aiding pest prevention.
When it comes to runner maintenance, wait until runners root before clipping them from the mother plant.
Secure rooted runners to soil with landscape staples to encourage strong growth and prevent disturbance from wind.
Following these steps assures healthy plants, fewer pests, and successful propagation, making your strawberry patch thrive all season long.
Frequently Asked Questions
How Long Does It Take for Strawberries to Produce Fruit?
You’ll see a fruiting timeline that varies with strawberry varieties.
June-bearing strawberries usually produce fruit 4 to 6 weeks after blooming, giving you a big harvest in late spring or early summer.
Everbearing types start in 6 to 8 weeks and keep going all season.
If you grow from seeds, expect 4 to 6 months.
To speed things up, maintain ideal conditions like good soil, plenty of sunlight, and regular watering.
Can Strawberries Grow Indoors Year-Round?
Yes, you can keep strawberries thriving indoors year-round, like a sunlit castle guarded by steady warmth.
With proper indoor lighting shining 12-16 hours daily, your plants bask in endless summer.
Container gardening lets you control soil and moisture perfectly, while temperature control between 65°F and 75°F guarantees they never face harsh seasons.
What Are Common Diseases Affecting Strawberry Plants?
You’ll often face common diseases like powdery mildew, which leaves a white coating on your strawberry leaves, hampering growth.
Root rot can strike if you overwater or have poor drainage, causing wilting and stunted plants.
Leaf spot diseases show up as dark spots that weaken your strawberries, making them vulnerable.
To protect your plants, guarantee good airflow, avoid overwatering, and choose disease-resistant varieties for healthier yields.
How Do I Know When Strawberries Are Ripe for Picking?
You’ll know strawberries are ripe when you see ripe indicators like a fully red color and a glossy sheen on the surface.
Gently squeeze the berry; it should yield slightly without being mushy.
Use picking techniques that avoid damaging the fruit by snipping the stem with scissors or pinching just above the berry.
Trust your flavor preferences; if it’s sweet and juicy, it’s ready to enjoy!
Can I Grow Strawberries From Store-Bought Fruit?
Yes, you can grow strawberries from store-bought fruit, but keep in mind that many strawberry varieties sold in stores are hybrids, which might affect seed viability.
For better success, choose high-quality, organic fruit to harvest seeds.
Using proper propagation methods, like carefully extracting and drying seeds, improves your chances.
Also, remember that fruit quality directly impacts your plants’ growth, so starting with fresh, ripe strawberries is key to thriving plants.
Conclusion
Now that you’ve got the hang of growing strawberries in just seven steps, you’re ready to reap the fruits of your labor. Remember, patience is key, and with a little TLC, your garden will be bursting at the seams with juicy berries.
Don’t be afraid to get your hands dirty. After all, every expert was once a beginner. Keep nurturing your plants, and soon enough, you’ll be enjoying fresh strawberries straight from your own backyard!